Design Series: Mockups
 The next design I have been working on is something completely for me*, so I thought it was a great opportunity to start a little series on my design process.
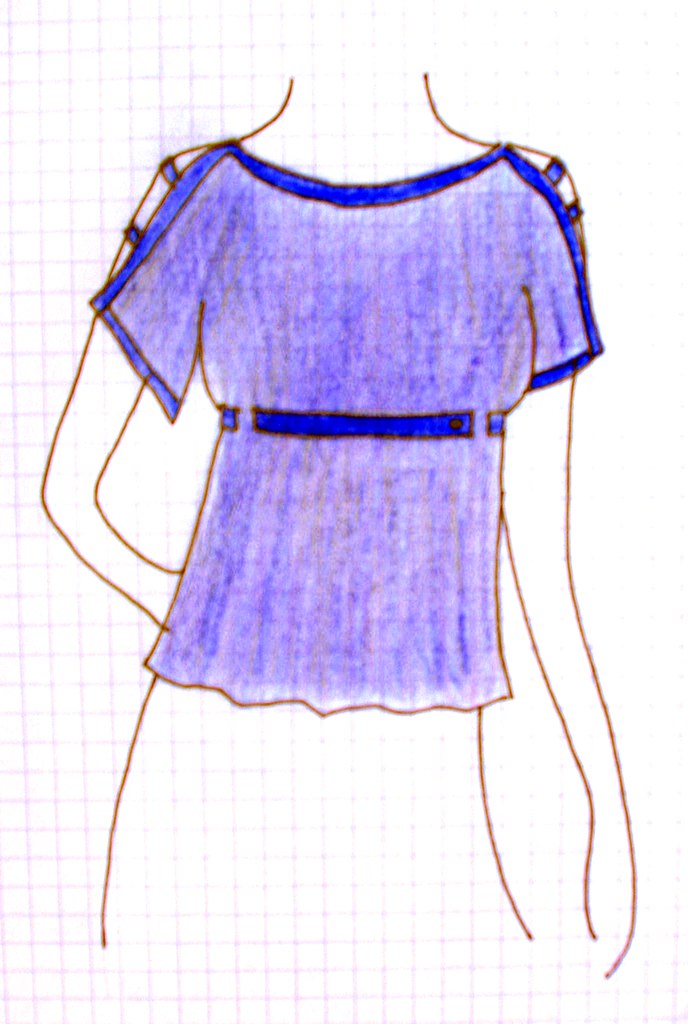
My design process always starts with some sort of inspiration. I have chatted with you before that my inspiration comes from everything I touch. For this design I was channeling muumuus. Yes, muumuus. Not the grandma kind, but the 60's larger woman kind. The ones that float around the body with big bold graphics, and usually are cinched somewhere at the bust line. Every photo or movie that I have seen of women wearing them in the late 60s I get the impression that they are strong fearless women. Since, I am large up top, I thought this would be a great jumping off point to make myself a really cool summer top.
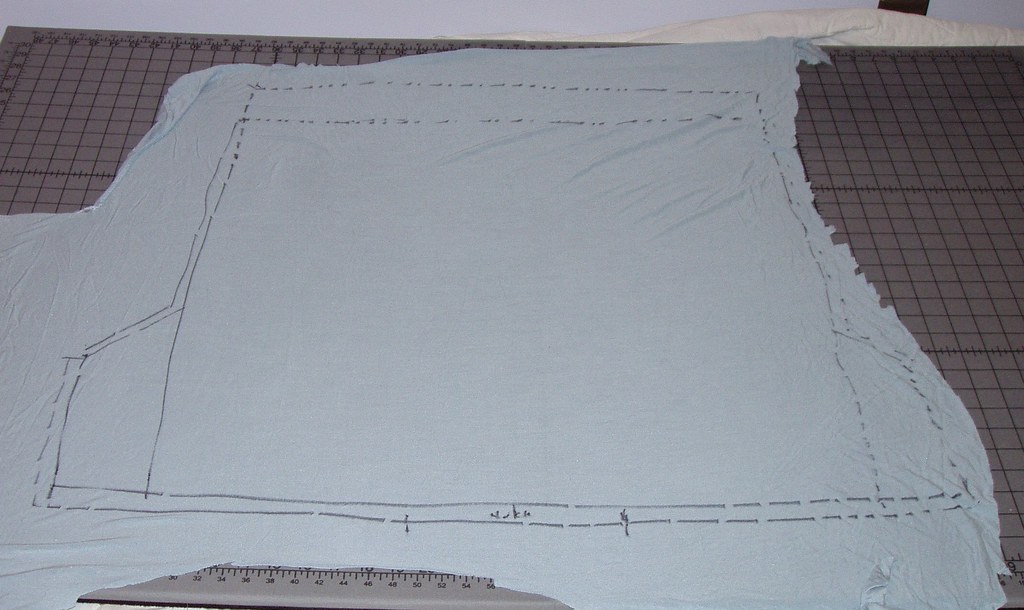 For this design, I was doing a motif pattern (which I'll talk about later) that will drape a ton, so I went into the jersey pile. I measured out my design concept on the jersey, adding seam allowance on the sides that I'll sow up. The measurements I figured out from knowing my motif gauge and working out a preliminary schematic. (in a future post I'll talk more about how I figure that out) As you can see, I don't use any straight lines, I am just sketching. I don't overly worry about being precise, I am just looking for basic shaping usually. Obviously, I'm more precise when I know it is important (like in cap sleeves). I then markup things that are important to me, like the neck area or the bust line. Anything that I'll want to scrutinize later. I cut it out, and sow it up and plop it on Susie Q. Then I play.
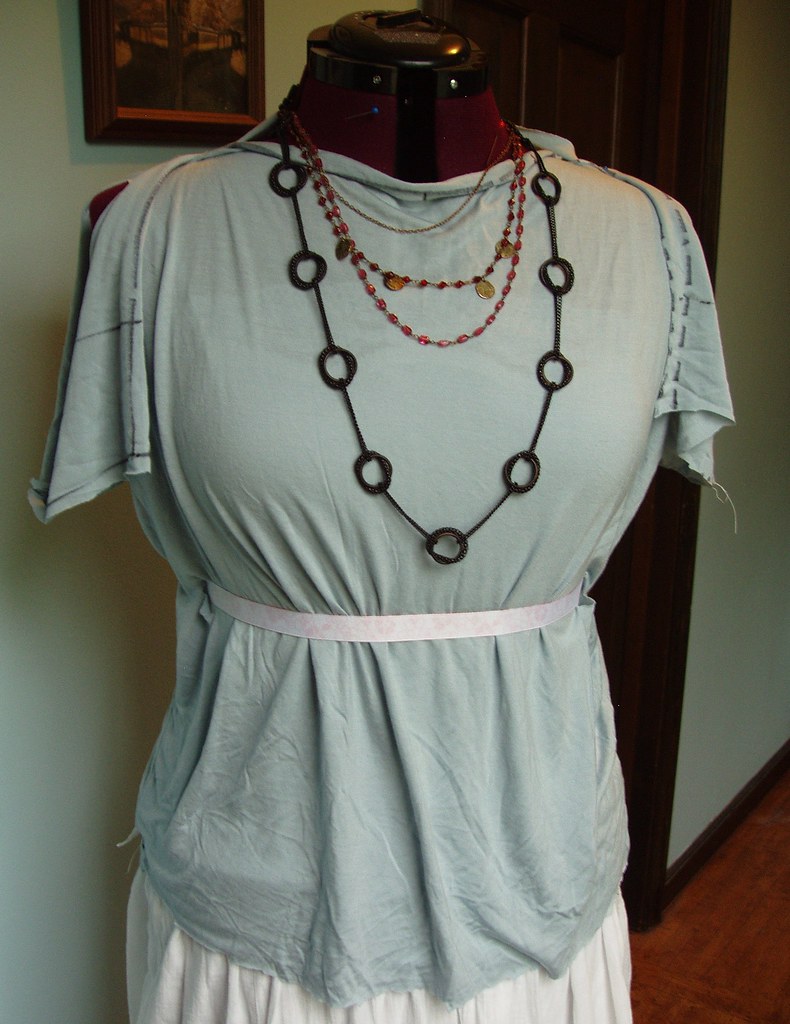 In this garment, I see the top of the garment being open, with it only slightly seamed at the neck and having it mainly open at the arms. I can tell right away that I will want to modify my design a bit to get a less bunchy neckline. (great to know!) I also play with the bust line. I can tell right a way that you can get a few different styles all by changing how often you thread the ribbon through the fabric. If its just in the front, you get a cape in the back which would be good for any women with areas they don't want to show off back there. If its woven in a lot, you get an empire waist. I also notice, when I try it on, that it will shorten up slightly (which I like since I'm short) do to all the bunching from the ribbon. But if I was taller, I'd probably want more length so it will end at the low hips instead of high hips on me. I note all this on the mockup, and head to crochet. So from this 15 min exercise, I learned all sorts of things that will make my life a lot easier when I am crocheting.
 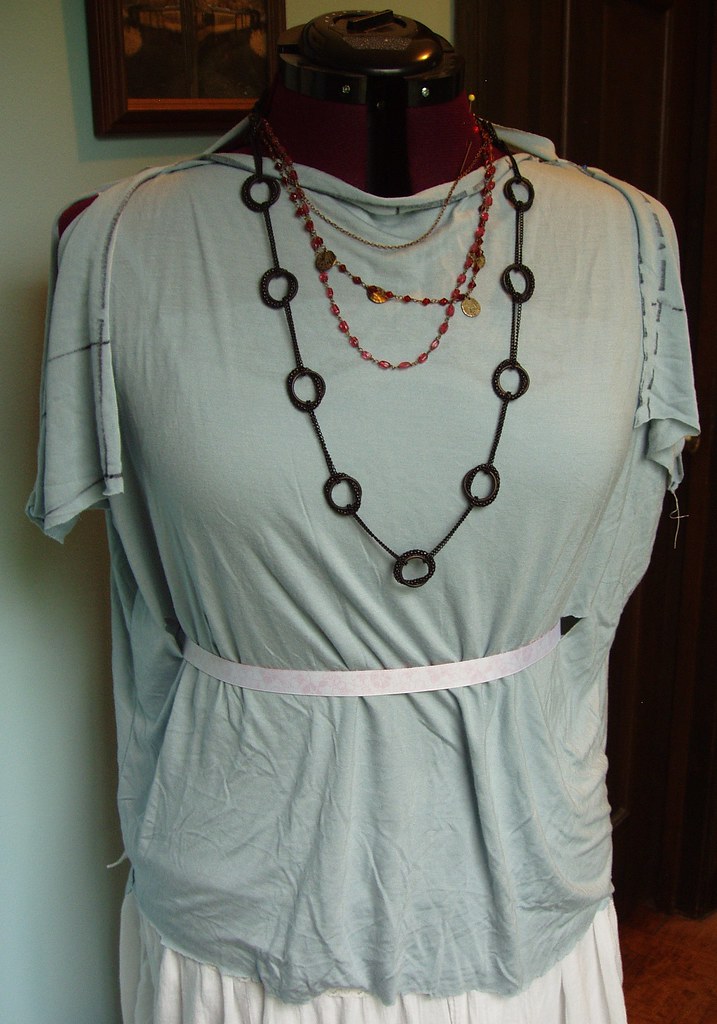 Annette had a great article on Crochetme on Mockup that I really suggest you check out. They are great for designing and for checking if a design would look good on you.


3 comments:
Robyn, I really appreciate the posts on your design process. Among other things, that link to the Crochetme article on mockups is really helpful. Look forward to seeing how the latest garment turns out!
Thanks as always for sharing your process! I look forward to following this series of posts.
Wow... I love seeing the process that you go thru to mock up an idea for a new design!
I think having an engineering background must be an awesome component to have along side all of those creative right brain activities of yours!
We get to enjoy the fruits of
Post a Comment